|
This project will focus on leaves, how most are symmetrical, and how they change in the Fall. We are pulling in our STEM focus with this project. We first talk about leaves and what makes them change in the fall. The chlorophyll going away and the tree storing it in the trunk to survive the winter. Next, we practice drawing leaves using the examples I provide.  Then I start to show them the steps to make the magic happen. Students will fold a piece of paper in half(long ways or hotdog style) and only draw HALF of a leaf along the fold or spine of the paper.  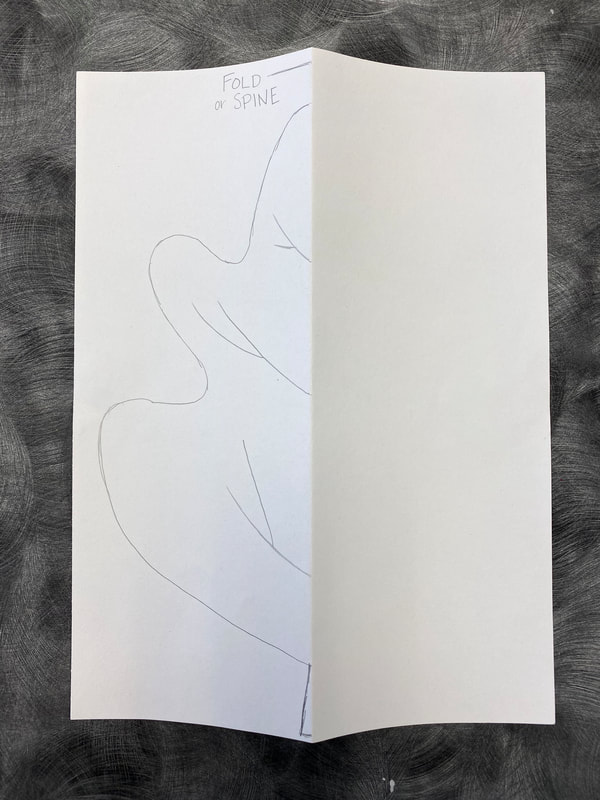 Next, they will use a black crayon to trace very boldly the half of the leaf. 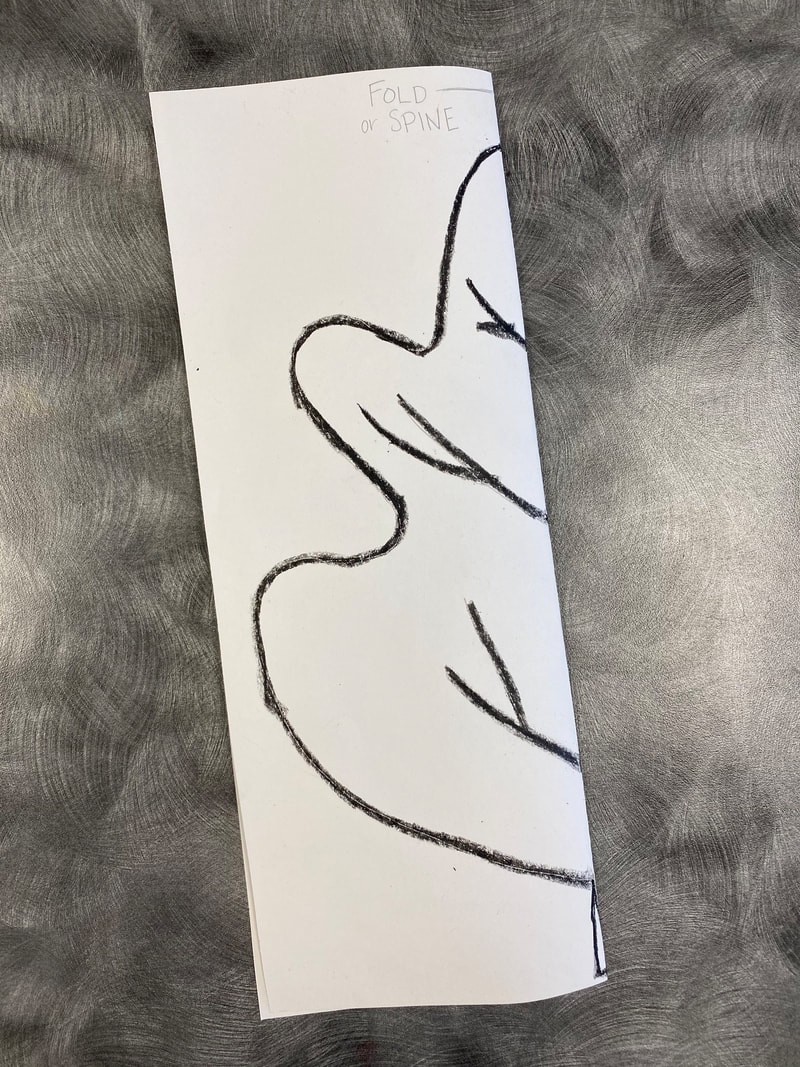 Then, the students will open the paper up all the way and then fold the paper back so that the leaf is on the inside. 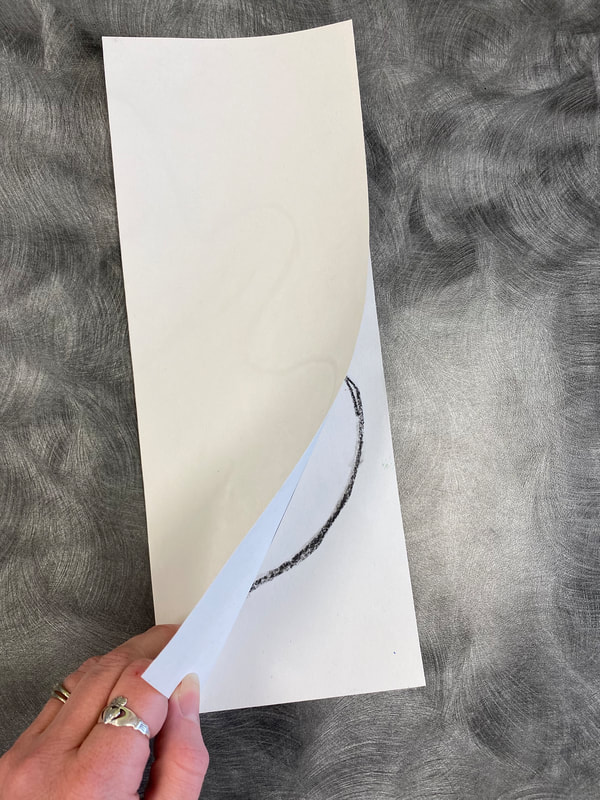 Next, will we need a pair of scissors, but not for cutting! We will use the handle to rub and transfer the image to the other side of the paper. This will create the magic of making your leaf symmetrical!  Voila!! After rubbing all over, open the paper up and see if most of the image has transferred to the other side. If some parts are difficult to see or didn't show up at all, close the paper and rub again in that area. Keep in mind the transfer will not be as dark as the original side. The students will need to trace the transfer side to make it equally as dark as the original side. Finally we discuss fall colors and why the leaves change colors. I remind the students of our Being Creative Crayons chart and mix and blend colors, while also creating a range of value. 
0 Comments
Will are continuing to work on our seascapes in class. Our focus now has been coloring them. Our in class students are limited to coloring with crayons. I have demonstrated how to use crayons in a fun way to make their art work really pop. I have used the chart below to show them the many different ways to use crayons. 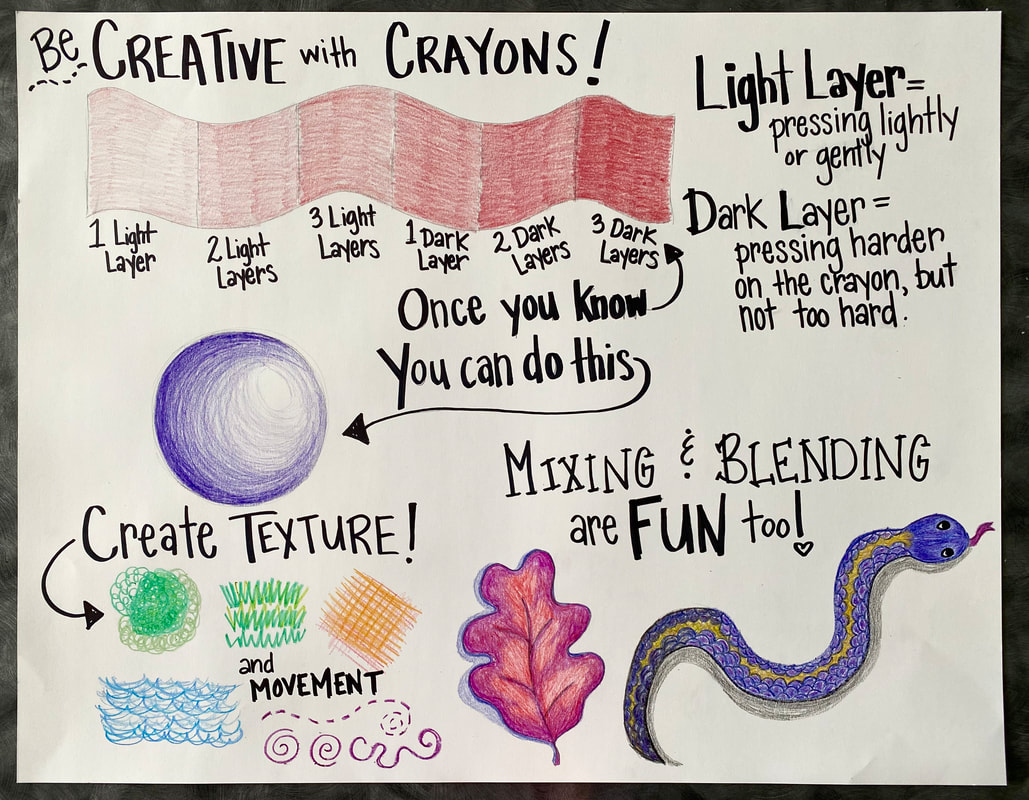 Introduction to parts of a seascape and landscape In this project we will be learning and drawing the parts of a seascape in order to show distance and spatial relationships. The FOREGROUND shows objects that appear close to viewer or are in front of all the other objects in the picture. These objects are often drawn larger than other objects that are farther away. Sometimes it can be confusing. Drawing a goldfish bigger than a whale might not make sense to your child at first. The BACKGROUND is the part of the picture that is behind all the other objects or that we want to appear to be far off in the distance. These objects are often drawn smaller than you normally think of them. If we want the whale to seem far away we need to draw it smaller than the goldfish that is super close to us. The MIDDLEGROUND is the part that comes between the foreground and background. In the middle. You wouldn't draw the shark quiet as big as the whale, but you would still draw it smaller than the goldfish that is in the foreground. 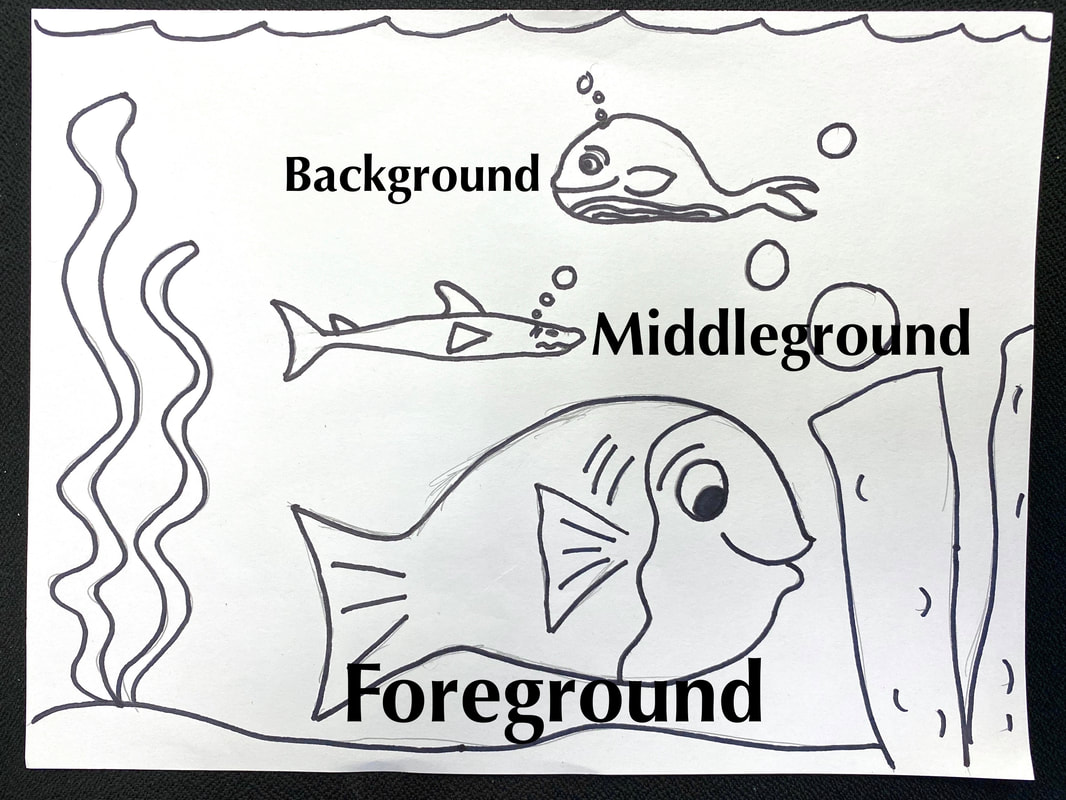 Supplies: Pencil, Paper, Markers or Crayons or WatercolorHave your child practice sketching a seascape showing larger sea-life in the background far away and smaller sea-life in the foreground.
I would also have them research different types of sea-life and even make a list verbally or written. Water is our STEM focus here at Burrus. I would even look up what fish and animals can be found in our rivers, lakes, and streams in Tennessee. After they have practiced and made sketches they should make their final drawings. Final drawing will be colored with whatever tools you have available. We will be using crayon in school, but you are welcome to use watercolors or whatever materials you have access to. Remember I'd love to see your work. You can email it to me or post it to the Burrus Art Room Facebook page, which are both linked at the bottom of the page. |
AuthorMrs. Lindsay Black |
 RSS Feed
